 Sequence by Area ( Modeling )
Tool summary :
Also see :
|
- Modeling (where Sequence by Area is a tool)
- Area box (a way to select members for Sequence by Area )
- Repeat Sequence (alternative to Sequence by Area )
- Update Attributes (alternative to Sequence by Area )
- General Status Options (alternative to Sequence by Area )
- Dividing a Model into Sequences/Zones (overview)
- Maximum sequences ( Home > Project Settings > Job > Modeling > Zone and Sequence > )
- Sequence Names ( Job > Modeling > Zone and Sequence > press " Sequence Names " > )
- Break major marks apart by ( Fabricator > Member & Material Piecemarking > the " Main Member " tab > )
Step-by-step instructions :
The following instructions assume that you are using a 3-button mouse. You must do either step 1c (preselection) or step 3 (in-tool selection) to perform this operation.
1a : The " Maximum number of sequences " must be set to a number greater than ' 1 ' before you can change sequences. You may also want to set up specific " Sequence Names " before you begin.
1b : If you are going to do step 1c, you may want to set the selection filter to ' Member ' or to specific types of members (' Beams ' and ' Columns ', for example).

Select Items bindings (step 1c) 1c (optional) : In Select Items mode with an appropriate selection filter selected, use Select or Select + (or draw an area box or Select Members by Number ) to select the member(s) that you want to sequence. When selected, the members will be displayed in the " Primary selection color ," which by default is green. Use Select- if you want to deselect members.
2 . Invoke Sequence by Area using any one (1) of the following methods:
▸ With Sequence Mode mouse bindings active, hold down the Shift key and left-click ( Area ).
▸ Choose Model > Member > Sequence by Area .
▸ Use a keyboard shortcut .
▸ Click the Sequence by Area icon, which is pictured above. If the icon is not currently on your ribbon, you can add it using Ribbon Editor .
3 . Skip this step if you already selected members is step 1c.
|
|
|
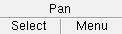
Select Item(s) bindings |
3a (if you didn't preselect) : The status line prompts you to " Select members to sequence ." Use Select Item(s) Mode options to select one or more members. Press the Enter key or right-click ( Menu ) and choose " OK " on the context menu to signal you are done selecting members.
4 . The Area Sequence Edit window opens. On it is a single entry field for applying the sequence you want to the selected members.
New sequence: The sequence from the Sequence Definitions list that you want to change the members to. To select a different sequence, press the "file cabinet" browse button (
) and double-click any sequence that is on the list. The sequence you enter will be applied to those members you selected (in step 1c or 3a) that have the to-be-changed sequences that you will select in step 5.

Alternative 1 : Press the " OK " button to continue.
Alternative 2 : Press " Cancel " to end the Sequence by Area operation and keep everything as it was before step 1. Do not continue.
5 . A selection dialog opens. On it is a list of all sequences that are currently assigned to the members you selected (in step 1c or step 3).
Alternative 1 : Select those sequences that you want changed to the " New sequence " you specified in step 4. If you select zero items, then no sequences will be changed. Press the " OK " button and go to step 6.
Alternative 2 : Press " Cancel " to end the Sequence by Area operation and keep everything as it was before step 1. Do not continue.
6 . All members selected in step 1c (or 3a) which have the sequence(s) selected in step 5 are now reassigned the " New sequence " entered in step 4.
Tip: To verify your results, use Show Sequence or Status Display .

